Today we're going to be latest african sex videosdiving a little deeper into overclocking the new Nvidia GeForce RTX 2080 Ti and RTX 2080, covering a whole range of things from how to overclock these cards, to typical achievable clock speeds, to performance and power consumption.
To start off this guide we'll be going through our standard methodology for overclocking Nvidia graphics cards and specifically the new RTX series. We'll also be showing you how Nvidia's new Scanner API works and just how good their one-click overclocking can be, comparing to a manual overclock, while also showing you how to do said manual overclock.
The cards we're using today are the Founders Edition RTX 2080 Ti and Founders Edition RTX 2080. Both come 'factory overclocked' in some sense compared to base-level board partner models, but that OC is quite small at just 90 MHz on the core, and nothing on the memory. But the card we're using doesn't really matter, the steps you see here will apply to all RTX cards.
The first thing we'll be doing is going through what's potentially the easiest method of overclocking your RTX card: using Nvidia's Scanner. One-click overclocking has been around for a while, but this time Nvidia has built a framework for doing it rather than letting board partners create their own algorithms, which the chip maker says is better tuned for their GPUs, more accurate, and more reliable.
To use Nvidia Scanner, you'll need to grab the latest versions of any overclocking utility. We tried EVGA Precision X1 and MSI Afterburner, both beta versions, and for the Scanner functionality we found Afterburner to be more reliable.
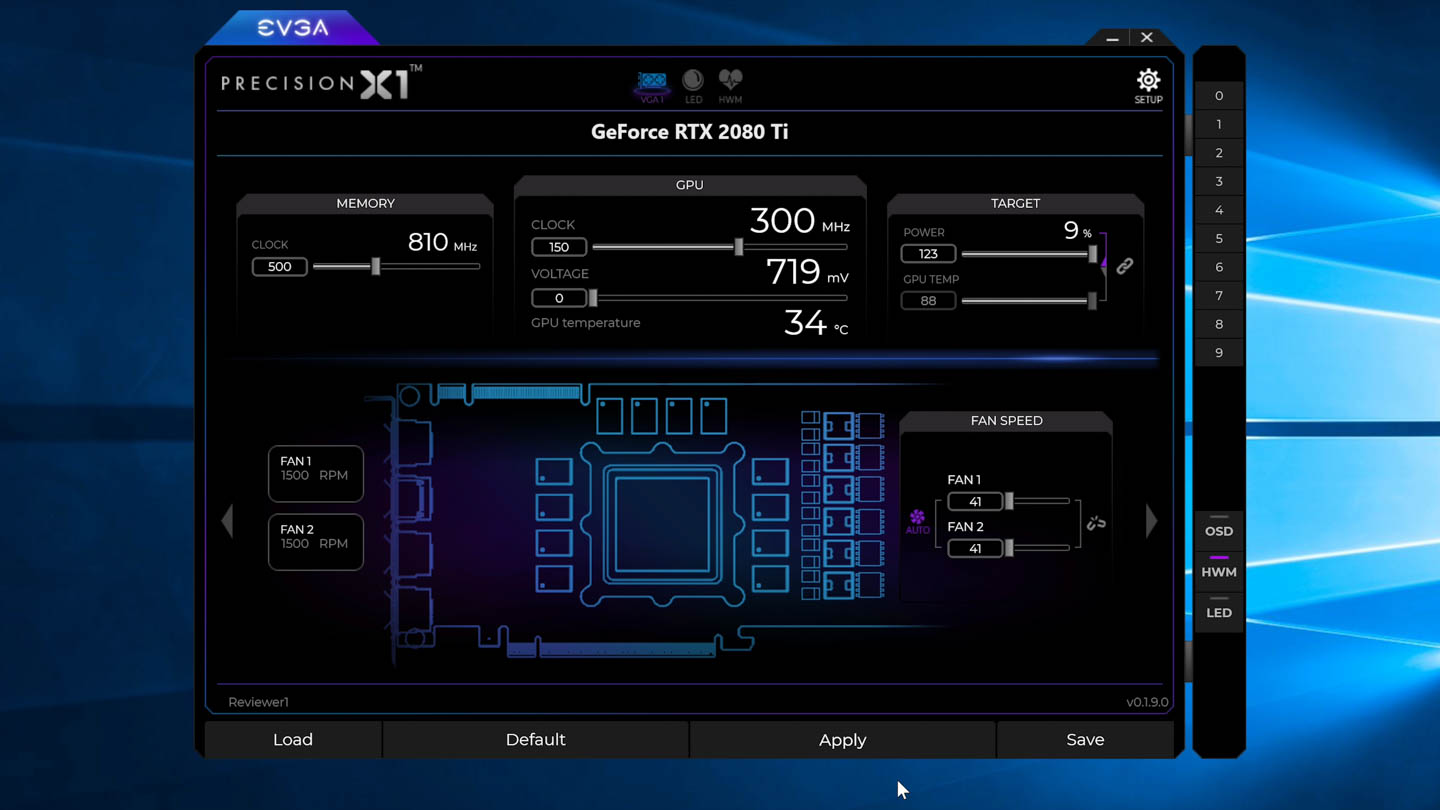
Had a few crash issues with the early version of Precision X1 which we assume will get fixed, whereas Afterburner seemed to work every time. It's a bit disappointing as Precision has a much nicer interface than Afterburner, but we'll get back to using Precision a bit later.
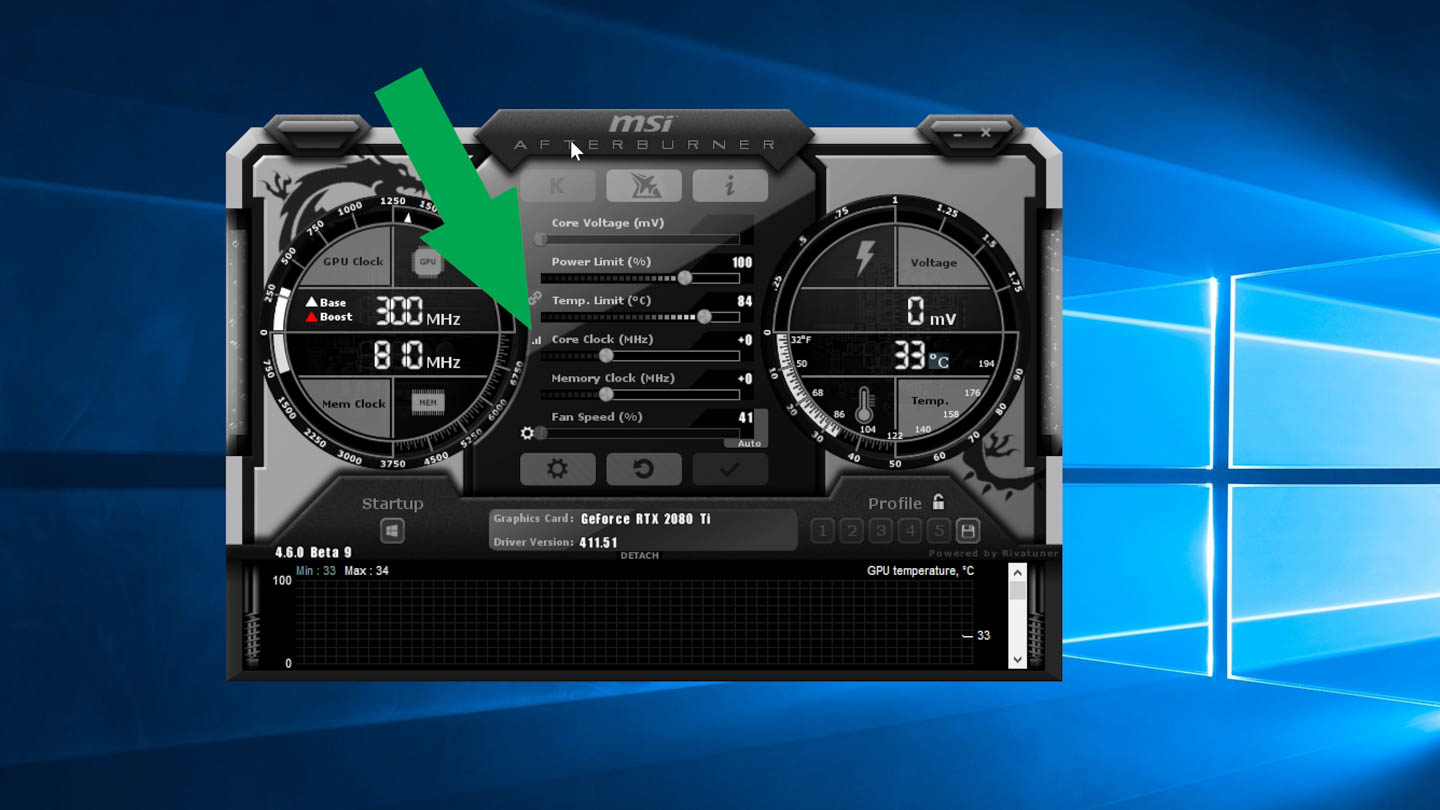
After you've installed and opened Afterburner you'll see a bunch of dials and sliders, bit of a cluttered interface but that's fine. What we're interested in is the small bar graph icon to the left of the core clock slider. At this stage it's not necessary to touch anything else in the app. Simply click on the bar graph icon, then click OC Scanner, and then in that window hit 'Scan'. Now you can sit back and wait a while because the one-click overclock process takes around 15 to 20 minutes.
What the Scanner is doing is basically running a bunch of clock speed tests at a range of voltages to find the exact voltage-frequency curve for your graphics card. It has its own test algorithm built-in to stress the GPU with the ability to recover from any hangs or crashes if the GPU is being pushed a bit too hard. It's basically simulating what we'd do with a manual overclock, but doing it faster and potentially more accurately.
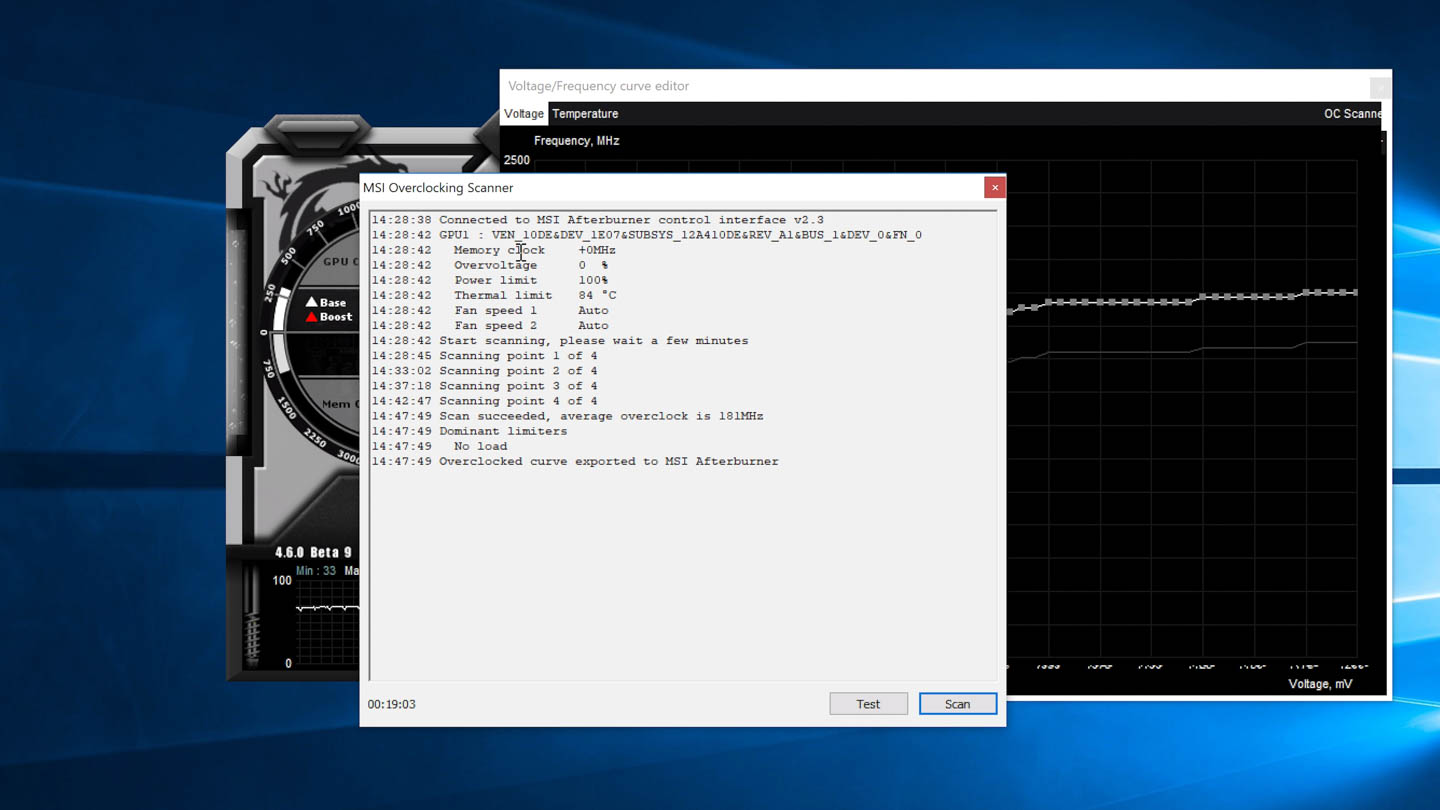
Don't worry if the application hangs or your screen goes black temporarily during the process, that's normal. At the end, you'll be given an average overclock, but crucially you'll get a full frequency curve, which potentially is a bit more efficient than a simple core frequency offset. You can see at the lower end of the voltage curve, we're getting slightly higher overclocks than at the top.
For the RTX 2080 Ti on average we achieved +181 MHz, but at the top end our OC is just +150 MHz. With the RTX 2080, we achieved an average of +113 MHz and a top-end OC of around +90 MHz
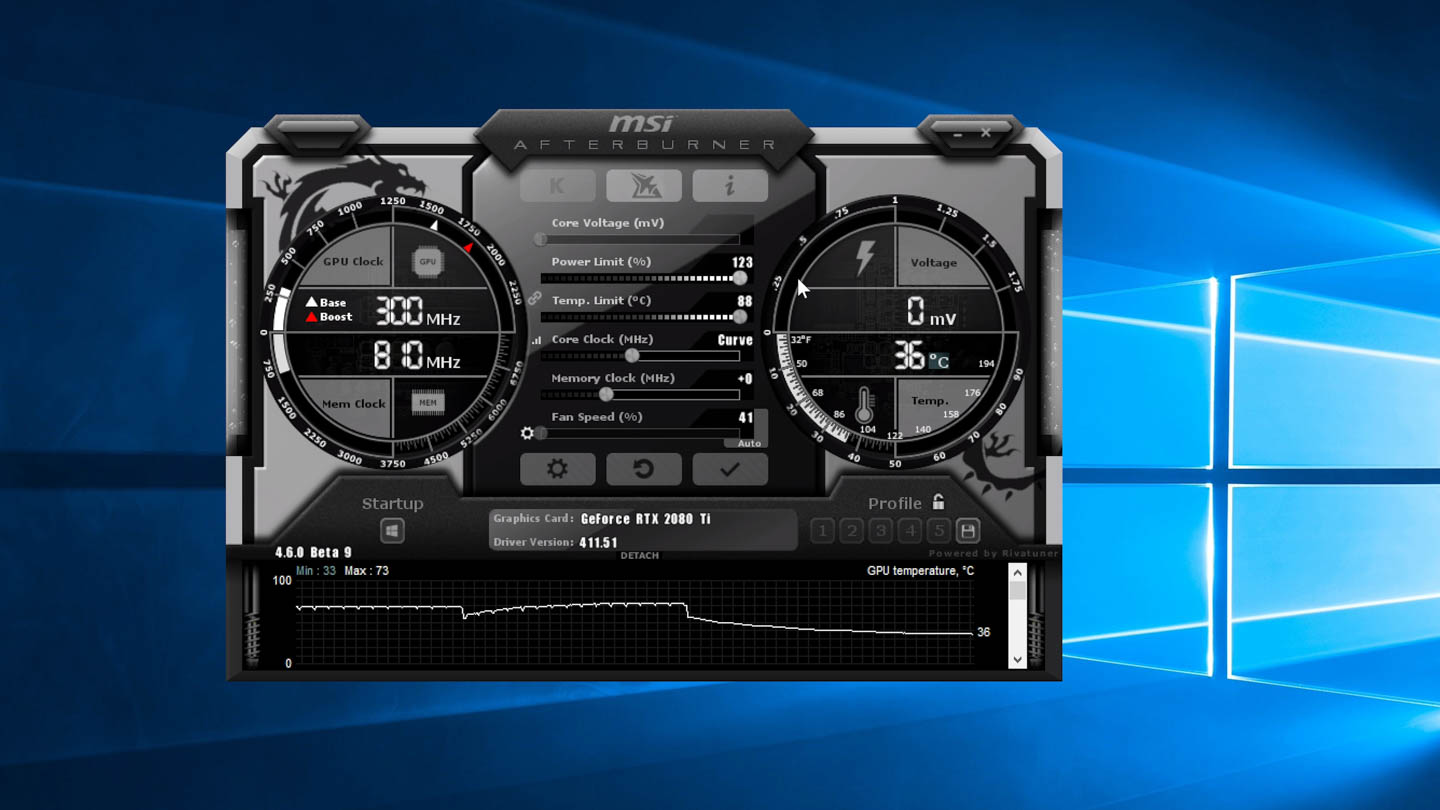
At this point, we'd recommend heading back into the Afterburner main application and cranking up the power and temperature limits to the maximum. We've never benchmarked a card, even a last-generation Pascal card, that didn't like having these limits raised all the way, so with these RTX cards it just makes sense to crank it up. This will allow Nvidia's GPU boost algorithm to push as high as possible on top of the frequency curve we've already set, going beyond the old limit.
One thing to note here is that we've set the power and temperature limit after running Nvidia Scanner. Nvidia says the Scanner only modifies the core clock, so if you change the power and temperature limits before hand, the Scanner might find different and potentially higher core clocks. However in our experience, we actually achieved lower clocks in the Scanner setting the power limit beforehand, so we'd recommend cranking it up after the Scanner is complete.
The other obvious limitation is the lack of memory clock gains, Nvidia Scanner only handles the GPU core and doesn't touch memory. So if you're after that simple, one-click overclock solution, you'll be missing out on any gains you'd get from tweaking memory. Core overclocking is much more important for getting performance gains, but a boost to memory can help out in some situations.
We've got the Scanner OC results now in the bag. Now let's see how to perform a manual overclock, and after we'll compare the manual overclock to the Scanner results.
For this we're switching to EVGA Precision X1 because it has a much nicer and more intuitive interface.

For a manual overclock we want to start from a decent point, so again we're going to crank the power limit and temperature limit to the maximum. We're also going to scroll the bottom section across to the Temp Tuner, and adjust the curve so we're getting the maximum clock speed at all possible temperatures. For our reference card this isn't a big deal as we're not reaching up to those highest temperatures, but if you are running above 84C, you'll want to adjust this curve for maximum performance.
From here, it's all about adjusting the two main sliders for memory and core frequency. The basic steps are we want to increase each value by a reasonable amount, apply the overclock, then validate it in a program like 3DMark to ensure we're not getting crashes at those settings.
The amount you increase the values is up to you, but note that you're not going to damage your card by choosing a value that's too high; instead you'll just crash your system and have to reset it. No big deal.
So for the RTX 2080 Ti we started with around a +150 MHz offset on the core and +500 on the memory, those are fairly conservative figures for this card. That worked in 3DMark, so we pushed the core up to +200 and memory up to +650. If you want to play it safer we'd recommend only changing one of those values per test run, but the more you become familiar with the process, the more you can adjust at once.
With +200 on the core our 2080 Ti crashed in 3DMark, so now it's a process of finding the exact limit. We stepped down in 10 MHz increments, eventually discovering that +180 was unstable, but +170 was perfectly fine. From here we can try to push up the memory even further using a similar sort of process, and for our model we settled on +700 being the sweet spot.
The final stable overclocks for this card were +170 MHz on the core and +700 MHz on the memory, and that's a fairly typical figure going on what we've seen from others. Note that if you have a non-FE or non factory-OC card, the core offset you'll need will be higher as you're coming from a lower starting point.
The vanilla RTX 2080 comes factory clocked a bit higher than the 2080 Ti, so we started with +100 MHz on the core and followed the same process. Eventually we settled on +110 MHz on the core and +700 MHz again on the memory for the RTX 2080.
Once you find what you think are stable overclocks it's always a good idea to validate them further in a game running for several hours, something very GPU intensive. While 3DMark's Time Spy gives a good indication of whether a card will work at a certain frequency, sometimes it will only crash under a longer test, so it's good to test both.
A quick note on voltage, Nvidia's Turing cards are voltage locked. In other words, Nvidia does not expose proper voltage controls to the user like you might get with overclocking a CPU on a motherboard. Instead we have a voltage slider, but it's not really an offset, what it theoretically does is raise the voltage limit by a few steps, but still within what Nvidia deems safe. And that comes at the expense of lifespan: Nvidia claims you should get 5 years out of stock voltage and just 1 year with the voltage limit raised slightly, so keep that in mind.
In practice, raising the voltage slider did absolutely nothing for our overclock, so it's not worth thinking about.
So on a pure clock offset basis, the Scanner OC coming in around +150 MHz at the top voltage range is lower than our +170 MHz manual offset for the 2080 Ti, with a similar gap for the 2080. Plus, of course, with manual overclocking we increased the memory frequency as well.
This indicates manual overclocking remains the way to go for many, and you can see that is the case when looking at our Shadow of the Tomb Raider results next...